
Cheesy Mozzarella Breadsticks
Introduction
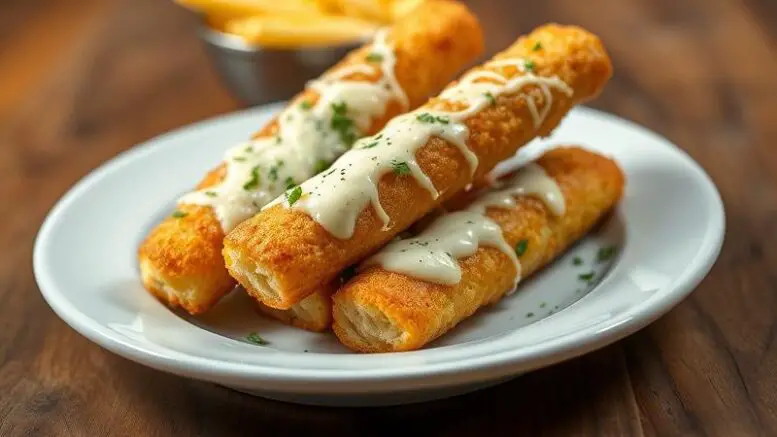
Imagine a snack that is both easy to make and bursting with flavor, perfect for any occasion. Cheesy Mozzarella Breadsticks are a creative twist on traditional breadsticks, using everyday ingredients to create a dish that is sure to impress. With their gooey mozzarella cheese and crispy exterior, these breadsticks are the ultimate comfort food. The best part? They can be prepared in no time, making them perfect for a quick snack or as an accompaniment to your favorite meals.
Why This Works
- Flavor balance and ingredient accessibility: The combination of melted mozzarella cheese, fresh herbs, and a hint of garlic creates a flavor profile that is both rich and well-balanced. Plus, the ingredients are easily found in most supermarkets, making this recipe accessible to everyone.
- Ease of preparation: The simplicity of this recipe is one of its strongest points. With just a few ingredients and straightforward steps, you can have delicious Cheesy Mozzarella Breadsticks ready in under 30 minutes.
- Impressive results with minimal effort: Despite the ease of preparation, these breadsticks look and taste like they came from a professional bakery. The golden-brown crust and stringy mozzarella cheese are sure to impress your family and friends.
Ingredients
- 1 1/2 cups warm water
- 2 teaspoons active dry yeast
- 3 tablespoons olive oil
- 1 teaspoon salt
- 3 cups all-purpose flour
- 1 cup mozzarella cheese, shredded
- 1/4 cup grated Parmesan cheese
- 1 tablespoon chopped fresh parsley
- 1 clove garlic, minced
Instructions
- Step 1: Begin by activating the yeast in the warm water. Add the yeast to the water and let it sit for 5-7 minutes, or until the mixture becomes frothy.
- Step 2: In a large mixing bowl, combine the olive oil, salt, and 2 cups of flour. Mix until a shaggy dough forms, then add the yeast mixture and continue mixing until a sticky ball forms.
- Step 3: Knead the dough on a floured surface for 5-7 minutes, or until it becomes smooth and elastic. Place the dough in a greased bowl, cover it with plastic wrap, and let it rise in a warm place for 10-15 minutes, or until it has doubled in size.
- Step 4: Preheat the oven to 400°F (200°C). Punch down the dough and divide it into 8-10 equal pieces. Roll each piece into a long, thin rope, then place the ropes onto a baking sheet lined with parchment paper. Brush the tops with olive oil and sprinkle with mozzarella cheese, Parmesan cheese, parsley, and garlic. Bake for 12-15 minutes, or until the breadsticks are golden brown and the cheese is melted and bubbly.
Handy Tips
- To ensure the breadsticks are crispy on the outside and soft on the inside, make sure to not overmix the dough and to bake them at the right temperature.
- For an extra crispy crust, try brushing the breadsticks with a little bit of water before baking.
- If you want to get creative, you can add different toppings to your breadsticks, such as diced tomatoes, olives, or pepperoni.
Heat Control
To achieve the perfect golden-brown crust, it’s essential to control the heat. Preheat the oven to 400°F (200°C) and bake the breadsticks for 12-15 minutes, or until they are cooked through and the cheese is melted and bubbly. Keep an eye on the breadsticks while they are baking, as the cooking time may vary depending on your oven.
Crunch Factor
The crunch factor is what sets these breadsticks apart from others. To achieve the perfect crunch, make sure to not overmix the dough and to bake the breadsticks at the right temperature. You can also try brushing the breadsticks with a little bit of water before baking to give them an extra crispy crust.
Pro Kitchen Tricks
- To make the breadsticks more flavorful, try adding a sprinkle of dried oregano or basil to the dough before baking.
- For a more golden-brown crust, try brushing the breadsticks with a little bit of egg wash (beaten egg mixed with a little bit of water) before baking.
- To make the breadsticks more crispy, try baking them on a baking stone or a cast-iron skillet.
Storage Tips
- To store the breadsticks, place them in an airtight container at room temperature for up to 2 days.
- To freeze the breadsticks, place them on a baking sheet lined with parchment paper and freeze until solid. Transfer the frozen breadsticks to a freezer-safe bag or container and store for up to 2 months. To reheat, bake the frozen breadsticks in a preheated oven at 350°F (180°C) for 5-7 minutes, or until crispy and golden brown.
Gift Packaging Ideas
If you want to give the Cheesy Mozzarella Breadsticks as a gift, consider packaging them in a decorative tin or a paper bag with a ribbon. You can also include a side of marinara sauce or a green salad for a complete gift. To make it even more special, consider adding a handwritten note or a sprinkle of parmesan cheese on top of the breadsticks.
Flavor Variations
- Garlic and Herb: Add a sprinkle of dried oregano and basil to the dough for a more herby flavor.
- Spicy: Add a sprinkle of red pepper flakes to the dough for a spicy kick.
- Mediterranean: Add a sprinkle of feta cheese and a drizzle of olive oil to the breadsticks for a more Mediterranean flavor.
Troubleshooting
- Texture problems: If the breadsticks are too dense, try adding a little bit more yeast to the dough. If they are too crispy, try baking them for a shorter amount of time.
- Ingredient replacements: If you don’t have mozzarella cheese, you can substitute it with other types of cheese, such as cheddar or parmesan.
- Over/undercooking signs: If the breadsticks are overcooked, they will be too crispy and golden brown. If they are undercooked, they will be too soft and pale. Keep an eye on the breadsticks while they are baking to ensure they are cooked to perfection.
FAQs
- Can I freeze the breadsticks? Yes, you can freeze the breadsticks for up to 2 months. To reheat, bake the frozen breadsticks in a preheated oven at 350°F (180°C) for 5-7 minutes, or until crispy and golden brown.
- Is this recipe gluten-free? No, this recipe is not gluten-free. However, you can try substituting the all-purpose flour with gluten-free flour to make it gluten-free.
- Can I double the recipe? Yes, you can double the recipe to make more breadsticks. Just keep in mind that you may need to adjust the baking time accordingly.
Conclusion
In conclusion, the Cheesy Mozzarella Breadsticks are a delicious and easy-to-make snack that is perfect for any occasion. With their gooey mozzarella cheese and crispy exterior, these breadsticks are sure to impress your family and friends. Whether you’re looking for a quick snack or a side dish to accompany your favorite meals, these breadsticks are a great choice. So go ahead, give this recipe a try, and enjoy the delicious taste of Cheesy Mozzarella Breadsticks!
Be the first to comment on "Crispy Cheesy Mozza Breadstick"