
No-Bake Mini Cheesecakes for Holidays
Introduction
As the holiday season approaches, we all look for desserts that are not only delicious but also easy to make and impressive to serve. No-bake mini cheesecakes fit the bill perfectly, offering a creamy, rich dessert that can be flavored and decorated to match any holiday theme. The best part? They’re incredibly easy to make, requiring no baking and using everyday ingredients that you might already have in your pantry. This recipe is all about creativity and flexibility, allowing you to experiment with different flavors and toppings to create unique mini cheesecakes that will be the star of your holiday gatherings.
Why This Works
- Flavor balance and ingredient accessibility: The combination of a graham cracker crust, creamy cheesecake filling, and your choice of toppings provides a perfect balance of flavors and textures that everyone will love. Plus, the ingredients are easily found in most supermarkets.
- Ease of preparation: Unlike traditional cheesecakes, these no-bake mini cheesecakes require no baking, which means less time and effort in the kitchen. The preparation is straightforward, and you can have them ready in no time.
- Impressive results with minimal effort: Despite the ease of preparation, these mini cheesecakes look and taste impressive. They’re perfect for holiday parties, gift exchanges, or as a special treat for your family.
Ingredients
- 1 1/2 cups graham cracker crumbs
- 1/4 cup granulated sugar
- 1/2 cup unsalted butter, melted
- 12 ounces cream cheese, softened
- 1/2 cup granulated sugar
- 1/2 cup sour cream
- 1 large egg
- 1 teaspoon vanilla extract
- Optional toppings: fresh fruits, chocolate shavings, whipped cream, nuts, etc.
Instructions
- Step 1: Prepare the crust by mixing the graham cracker crumbs and sugar in a bowl. Stir in the melted butter until the mixture is evenly moistened. Press about 1 tablespoon of the mixture into the bottom of each mini cheesecake pan or muffin tin. Refrigerate for about 10 minutes to set.
- Step 2: In a large mixing bowl, beat the cream cheese until smooth. Add the granulated sugar and beat until combined. Beat in the sour cream and vanilla extract. Finally, beat in the egg until well incorporated.
- Step 3: Pour the cheesecake batter into each mini crust, filling them about 3/4 of the way full. Refrigerate for at least 4 hours or overnight until set.
- Step 4: Once set, remove the cheesecakes from the refrigerator about 30 minutes before serving to allow them to come to room temperature slightly. Top with your choice of toppings and serve.
Handy Tips
- Use high-quality ingredients: The taste and texture of your cheesecakes will depend on the quality of your ingredients, so choose the best you can find.
- Don’t overmix: Mix your batter just until the ingredients are combined. Overmixing can lead to a dense cheesecake.
- Experiment with flavors: Try adding different extracts (like almond or coconut) to the batter for unique flavors, or use different types of cookies for the crust.
Heat Control
Since these cheesecakes are no-bake, you won’t need to worry about heat control in the same way you would with baked goods. However, keeping them refrigerated at a temperature of 40°F (4°C) or below is crucial for food safety and to prevent spoilage.
Crunch Factor
The crunch factor in these mini cheesecakes comes from the graham cracker crust. To ensure your crust remains crunchy, don’t overmix the crust ingredients, and make sure to press the mixture firmly into the bottoms of the pans. If you prefer a crunchier topping, you can sprinkle some chopped nuts or cookie crumbs on top of the cheesecakes before serving.
Pro Kitchen Tricks
- For a water bath without the mess, place the cheesecake pans in a larger pan or tray filled with hot water to about halfway up the sides of the cheesecake pans. This helps prevent cracking, though it’s less necessary for no-bake cheesecakes.
- Use a variety of molds: Instead of traditional round cheesecake pans, try using silicone candy molds or ice cube trays for fun shapes.
- Clean as you go: To make cleanup easier, wash your utensils and bowls as you finish using them. This prevents ingredients from hardening and makes the process less overwhelming.
Storage Tips
- Store the cheesecakes in an airtight container in the refrigerator for up to 5 days.
- For longer storage, you can freeze the cheesecakes. Place them in a single layer in a freezer-safe container or bag, making sure they don’t touch each other to prevent sticking. Frozen cheesecakes will keep for up to 2 months. Thaw frozen cheesecakes in the refrigerator overnight.
- When reheating, let the cheesecakes come to room temperature or gently heat them in the microwave, checking every few seconds to avoid melting.
Gift Packaging Ideas
These mini cheesecakes are perfect for gifting, especially during the holidays. Consider packaging them in decorative tins, jars, or gift boxes. You can also wrap each cheesecake individually in plastic wrap or aluminum foil and then place them in a gift bag or box. Adding a ribbon or a gift tag with a personal message makes the gift even more special. For a more rustic look, use wooden crates or baskets filled with cheesecakes and decorated with greenery or flowers.
Flavor Variations
- Different spices: Add a pinch of cinnamon, nutmeg, or cardamom to the batter for a unique twist.
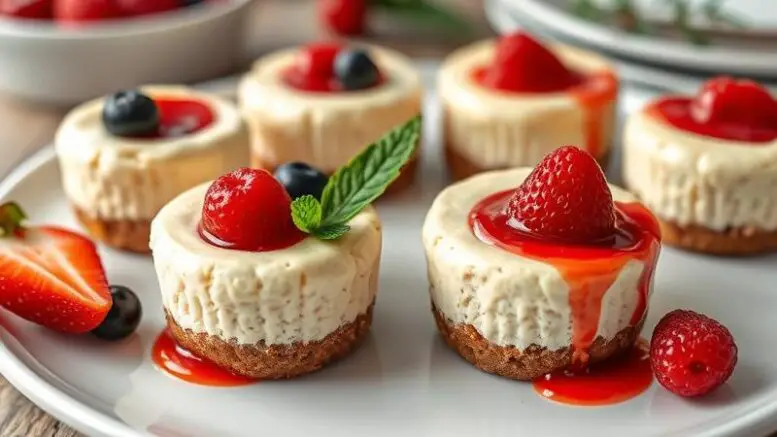
- Creative toppings: Use fresh fruits like strawberries, blueberries, or raspberries, or try caramel sauce, chocolate shavings, or toasted nuts for added texture and flavor.
- Ingredient swaps: Replace the graham cracker crumbs with crushed cookies like Oreos or peanut butter cookies for a different flavor profile.
Troubleshooting
- Texture problems: If your cheesecakes are too soft, they might not have been refrigerated long enough. If they’re too hard, they might have been overmixed or refrigerated for too long.
- Ingredient replacements: If you don’t have sour cream, you can substitute it with Greek yogurt or a mixture of milk and lemon juice.
- Over/undercooking signs: Since these are no-bake, you won’t have to worry about overcooking. However, under-refrigeration can lead to soft or runny cheesecakes.
FAQs
- Can I freeze it? Yes, you can freeze the cheesecakes for up to 2 months. Thaw them in the refrigerator overnight when you’re ready to serve.
- Is it gluten-free? Depending on the type of cookies you use for the crust, these cheesecakes can be gluten-free. Look for gluten-free graham crackers or cookies to make the crust.
- Can I double the recipe? Yes, you can easily double or triple the recipe if you’re serving a larger crowd. Just remember to adjust the refrigeration time slightly if you’re making a larger batch.
Conclusion
Making no-bake mini cheesecakes for the holidays is a great way to impress your guests without spending hours in the kitchen. These bite-sized desserts are not only delicious but also versatile, allowing you to experiment with different flavors and toppings. Whether you’re a seasoned baker or a beginner, this recipe is sure to become a holiday favorite. So, don’t be afraid to get creative and make these mini cheesecakes your own. Share your experiences, tips, and favorite flavor combinations in the comments below, and happy baking!
Be the first to comment on "No Bake Mini Cheesecake Holidays"