
Colorful Easter Rice Krispie Treats Recipe
Introduction
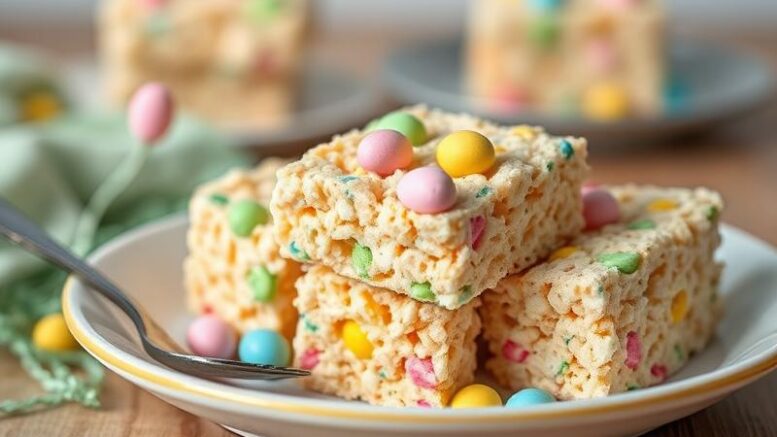
Welcome to the most vibrant and delicious Easter treat recipe you’ll ever try – Colorful Easter Rice Krispie Treats! These classic Rice Krispie treats are elevated to a whole new level with the addition of colorful sprinkles, Easter-themed candies, and creative shapes. What’s more, they are incredibly easy to make, using everyday ingredients that you probably already have in your pantry. The best part? They’re perfect for kids and adults alike, making them an ideal activity for the whole family to enjoy together during the Easter season. So, let’s dive into the world of colorful Easter fun and create some unforgettable Rice Krispie treats!
Why This Works
- The combination of marshmallows, butter, and food coloring creates a flavor balance that is both sweet and tangy, while the accessibility of the ingredients makes it a breeze to prepare.
- The ease of preparation is unparalleled – simply melt, mix, and shape, making it a perfect activity for busy parents or those new to baking.
- Despite the simplicity, the results are impressively vibrant and fun, guaranteed to bring a smile to everyone’s face, making it an ideal treat for Easter gatherings or parties.
Ingredients
- 3 cups of Rice Krispies cereal
- 12 oz (340g) of marshmallows
- 1/4 cup (55g) of unsalted butter or margarine
- Food coloring (pastel colors for Easter theme)
- 1 teaspoon of vanilla extract (optional)
- Easter-themed sprinkles, candies, or edible decorations
- Wax paper or parchment paper for cooling
- Cookie cutters (Easter-themed shapes like eggs, bunnies, etc.)
Instructions
- Step 1: Prepare Your Workspace – Lay out a large piece of wax paper or parchment paper on your countertop. This will be your workspace for shaping the treats.
- Step 2: Melt the Marshmallows – In a large saucepan or pot, melt the butter or margarine over low heat. Add the marshmallows and stir until they are completely melted and the mixture is smooth. Remove from heat.
- Step 3: Add Color and Flavor – Add a few drops of food coloring to the marshmallow mixture to give it a pastel color. You can also add a teaspoon of vanilla extract for extra flavor. Mix well.
- Step 4: Mix in the Cereal – Quickly add the Rice Krispies cereal to the marshmallow mixture and stir until the cereal is evenly coated.
- Step 5: Shape the Treats – Pour the Rice Krispie mixture onto the prepared workspace. Let it cool slightly, until it’s easy to handle. Use your hands or a spatula to shape the mixture into desired shapes. Use Easter-themed cookie cutters to create fun shapes like eggs, bunnies, and more.
- Step 6: Decorate – Once the treats are shaped, decorate them with Easter-themed sprinkles, candies, or edible decorations. Let them cool and harden completely before serving.
Handy Tips
- For easier handling, slightly dampen your hands with water before shaping the Rice Krispie mixture.
- Experiment with different colors and combinations to create unique Easter hues.
- Consider using a silicone mat or lightly greased surface to prevent sticking.
Heat Control
When melting the marshmallows, it’s crucial to use low heat to prevent them from burning or browning. Stir constantly to ensure even melting. If using a microwave, heat in short intervals (10-15 seconds) and check until the marshmallows are melted, stirring between each heating.
Crunch Factor
The crunch factor in these treats comes from the Rice Krispies cereal. To maintain the crunch, it’s essential to not overmix the cereal into the marshmallow mixture, and to handle the treats gently when shaping them.
Pro Kitchen Tricks
- For a professional finish, use a small amount of shortening (like Crisco) to grease your hands or spatula, making it easier to handle and shape the treats without them sticking.
- Invest in a set of cookie cutters specifically designed for thick dough or Rice Krispie treats, as they will provide cleaner cuts and less crumbling.
Storage Tips
- Store the treats in an airtight container at room temperature for up to 3 days.
- For longer storage, consider freezing the treats. Place them in a single layer in a freezer-safe bag or container and freeze for up to 2 months. Thaw at room temperature when ready to serve.
Gift Packaging Ideas
These colorful Easter Rice Krispie treats are perfect for gifting. Consider packaging them in clear cellophane bags tied with pastel-colored ribbons or placing them in small Easter-themed baskets or containers. You can also wrap them individually in plastic wrap or wax paper and decorate with stickers or small Easter decorations.
Flavor Variations
- Try adding different extracts like almond or coconut to the marshmallow mixture for unique flavors.
- Experiment with various types of cereal for different textures and tastes.
- Use different types of sprinkles or candies to match various Easter themes or colors.
Troubleshooting
- If the treats become too sticky, they might have been overmixed or exposed to too much moisture. Try adding a bit more cereal to balance.
- For treats that are too hard, they might have been overcooked or left to dry for too long. Try making a new batch with less cooking time or handling them more gently.
FAQs
- Can I freeze the treats? – Yes, you can freeze them for up to 2 months. Thaw at room temperature when ready to serve.
- Are they gluten-free? – Traditional Rice Krispies cereal contains gluten. For a gluten-free version, use gluten-free cereal alternatives.
- Can I double the recipe? – Yes, you can easily double or triple the recipe to make more treats. Just ensure you have a large enough saucepan to handle the increased volume.
Conclusion
With these Colorful Easter Rice Krispie Treats, you’re not just making a dessert; you’re creating memories. The process is fun, the results are adorable, and the taste is deliciously sweet. Whether you’re a seasoned baker or a novice in the kitchen, this recipe is perfect for anyone looking to add a bit of Easter magic to their holiday celebrations. So go ahead, get creative, and happy Easter baking!
Be the first to comment on "Colorful Easter Rice Krispie Treats"